Showing posts with label crafts. Show all posts

Wednesday, January 11, 2017

Altered Playing Cards


I had fun yesterday playing with a deck of cards. I am a member of the "Junk Journal Junkies" Facebook group and the challenge of the month is to alter 5 Playing Cards.  I grabbed a deck and started working to change them.


First I sanded the backs just in case the slick finish resisted the Modge Podge I decided to use as glue. 
Next you can glue them to any paper you choose. I decided to make these journaling cards so coffee stained card stock was added.

You can decoupage plain card stock if you like.
When the glue is dry add old sewing patterns, book text and art work of any kind to the front. I chose to color copy some of my sketches on card stock and cut them down to fit.


 The above card is made with the new Jane Davenport face stamp that appeared at Michaels craft stores this week. I used watercolors to paint her hair. If you don't draw you can go to a site "The Graphic's Fairy" . com and use her free images. If you would like to learn to draw I recommend watching Dina Wakely You Tube channel on how to draw a face. It takes a bit of practice but if I can learn-so can you!


This is a doodle of a beach scene I drew years ago. You can see how I cut and blended the two on the final card. Yes I know it is sideways, but I haven't learned how to turn photos yet.....


This was a fun craft and easy to do. I would advise you to print your photos or artwork on card stock rather than printer paper to avoid bleed through.

Thanks for joining me today and happy crafting!

Lynda Harley


Saturday, January 4, 2014

A Haven of Books Canvas:READ

Happy New Year Peeps!

     After our family "company" left it was time to get out the supplies and make something.
I opted for another canvas decorated with books.

The idea came from a YOU  TUBE video....the artist is Vicky Papaioannou entitled Art Journal Page:Reading. I watched it several times, made a canvas and sold it at a craft fair in November.


This is the one I completed today.......READ.....


This is the first one that I did. The canvas is much smaller. It was a good start for my first one. There is a learning curve if you haven't been to art school and learned how to work with some of the mediums.


The above canvas had a grey cardstock base and books that were hand made as shown in the youtube video. Images from the internet.

This canvas I used paper from Cratepaper.com, Emma's Shoppe Collection}Books #E5855
Glue using medium to a cut up empty roll from paper towels. Distress edges with Tim Holtz Walnut stain.

Below: Cover the canvas with tissue paper. I used Tim Holtz music and dictionary words. Stain with distress ink, faded jeans on bottom, tumbled glass on top and walnut around all the edges. Mix modeling paste with black acrylic paint and stencil on eye chart(or whatever you want)
Build books one at a time allowing to dry in between....patience is a virtue....I am still working on that part...sometimes I can't wait so I rush things a bit.....having to weigh down the books so they will stick...
I printed off Alice from the Graphic's Fairy and placed her on the right side of the canvas after coloring with Tim Holtz distress ink markers.

Stamp a library card with "Books" and add any other stamps. These were from Tweety Jill's Book Artist and Vintage School Days.


Then I decided to add several clocks and Ex Libris card plate from Pottery Barn. It was lacking something at the top....a vintage alphabet printed off, colored, distressed and backed with blue cardstock added to distressed tag punched from Creative Memories....add jute string and I thought it was done.....


Then I decided to add a frame of the small books not used....so around the canvas I went taking several hours to finish....Now a 4 day project is finally done.

Tada: (is that a word?)


Close ups: haha, I should have swept off the back porch before the photos!


You really should watch the video. It is 20 min. long but very detailed. Vicky is a great teacher! My books are a little more wavy than hers.....but this is crafting.....not an exact science I am sure! 

~Lynda~
Email me @Lyndalhcropshop@gmail.com if you have questions.

Linking up with  Parties below:
Think Pink Sunday


http://i1.wp.com/onekriegerchick.com/wp-content/uploads/2014/01/Header-photo-Hit-Me-with-your-Best-Shot-Link-Party-1.jpg Savvy Southern Style

Monday, August 19, 2013

Summer's End 2013

School Days are here again....

     The end of summer for us is the beginning of school. Oddly enough our last weekend of freedom before the children return to school was spent at the beach with my sisters.....we spent the first weekend of summer vaca in Paris together.

Looks like a bird convention......


Not great pics.....still practicing with my iphone.

Nice Hobie......great colors against the blue sky......


It was fun to visit Paris.....glad the youngest is organized, and a great event planner.....


While shopping in Daytona, we noticed this cute taxi bag by Betsy Johnson.......is a trip to NYC in the future????   Nah, but the bag is darling! It would hold a round trip ticket and credit card....

I have been crafting full swing to get ready for the Fancy Flea, Plant City, Fl  in November.

Inspiration came from a YOUTUBE video....Vicky Papaioannou, Art Journal Page:Reading

A preview of the canvas I am still working on:


The books are made with strips of scrapbook paper rolled to look like books.(use a pencil) I covered a flat canvas with embossed paper then attached the books with foam dots. I need a globe or something else teachery....is that a word? I watched the artist on a You Tube video, but now I can't find it to give her credit....she was amazing. I'll have to search my pinterest boards.....I think I pinned it somewhere....

I am hoping a teacher/librarian will find this attractive and make a purchase!  How is your fall shaping up? Back to school? Quiet moments with the children busy with homework? Be blessed and enjoy each and every moment with those precious darlings in your care!

~Lynda

Join the parties below and meet someone new!


PJH Designs


Boogieboard Cottage

Saturday, May 18, 2013

Luggage tags

Bonjour Peeps! Summer is just 3 weeks away and we are already in packing mode here....so I thought I would share a very special craft that I learned years ago from my artsy niece Jana. Luggage tags that are personalized have been around for a while, but this paper jumped off the shelf and into my arms before I knew what hit me! Graphic 45 French Country line was an immediate draw when I spotted the thatched roof....Marie Antoinette's cottages at Versailles came to mind. I selected several sheets of this line of  paper that I thought would be perfect for a scrapbook and 2 sheets of the A La Carte that would make the perfect set of luggage tags.


Gather your supplies: scissors, hole punch(crop-a-dile), laminating pouches and machine(available at Walmart/craft stores), sharpie, paper for tags, gromment and tool for setting, hammer.


Begin by typing address on cardstock and adhere with adhesive. The A-La-Carte tags are really journaling boxes that are 2-sided. Double sided paper works best for laminating.
Once you have laminated the tags, the most difficult part is setting the gromments. These are sometimes found in the sewing section at craft stores because they are really for fabric. This part of the craft is the most difficult.


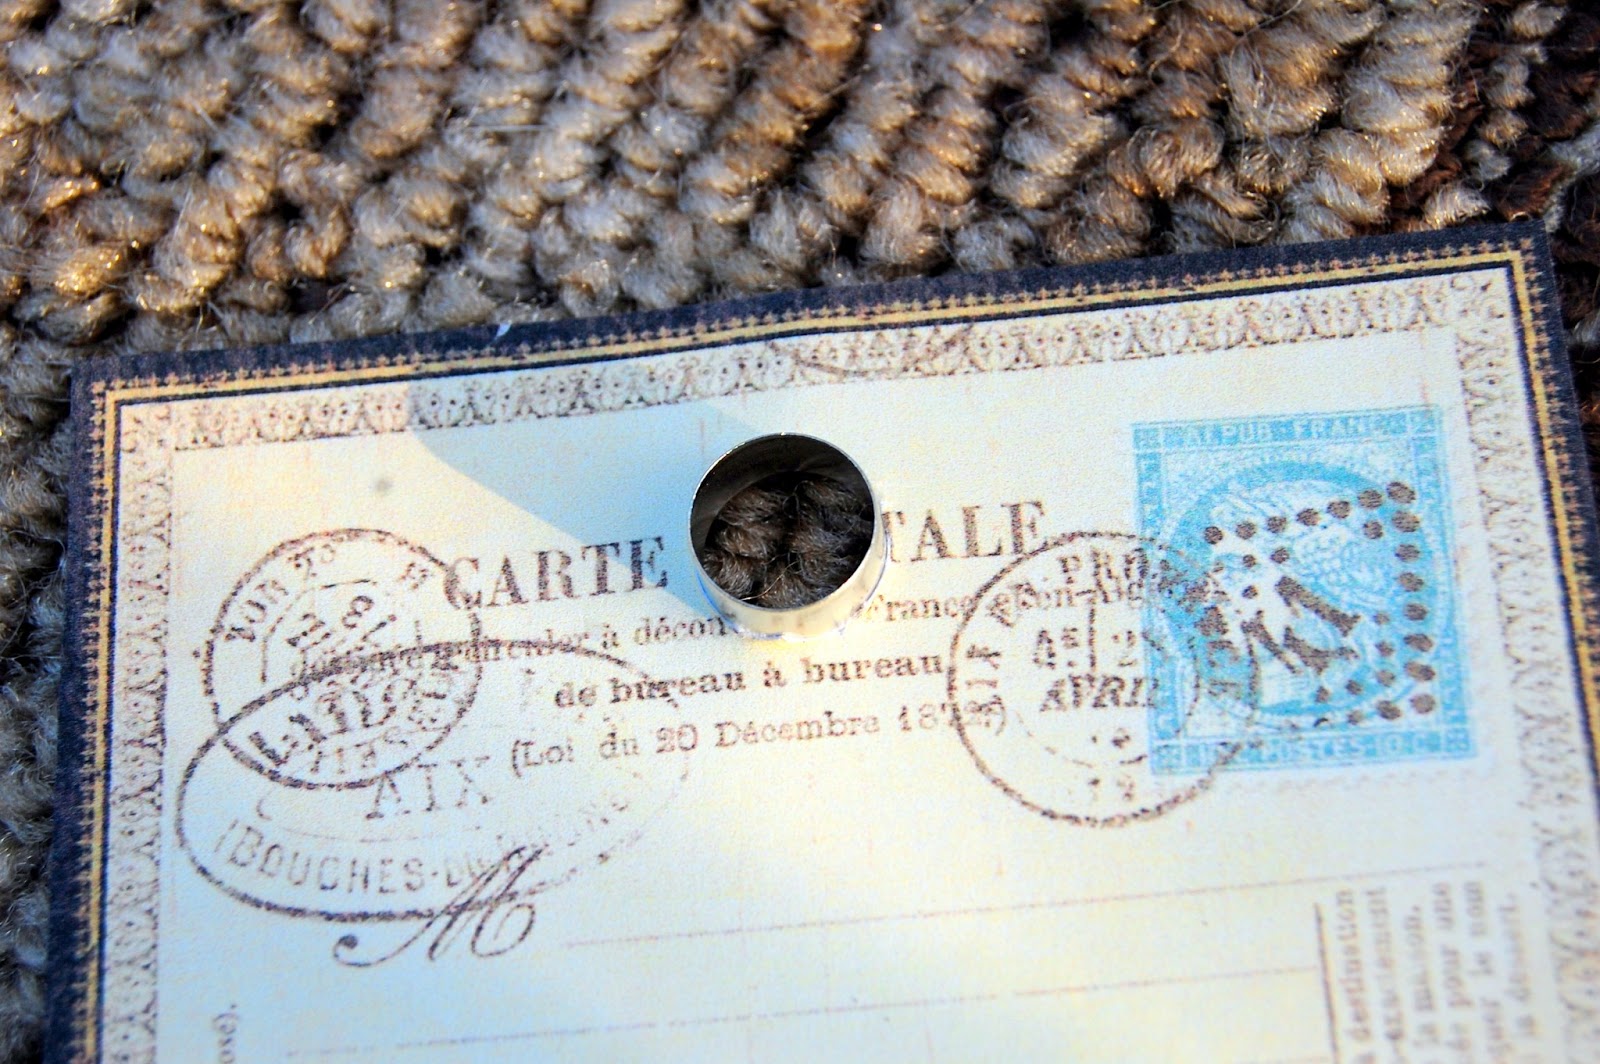
Above: draw a small circle where you want to place the gromment. The picture does not have the sheet laminated, because I had already finished the tags when I thought about showing you this step......so remember, your tags will be laminated FIRST before you draw the circle. Cut out area with punch. Don't get the hole too large....just big enough so the shank of the gromment fits.


Above: hole punch-after you laminate the paper.......

place the gromment through hole, then see below, place the other fitting ring on top and set it.


The above tool kit came with the package. They may be labeled "gromments" or "fasteners"
Place the gromment in the circle and the tool on top and POUND with the hammer HARD ON CONCRETE , WOOD OR OTHER HARD SURFACE OUTSIDE. Please do not do this in the home or you will leave dings in your floor.
Once you have set the gromment, the final step is easy.....

Embellish with ribbons, foo-foo, string, rope, raffia, thread, or your hearts desire!

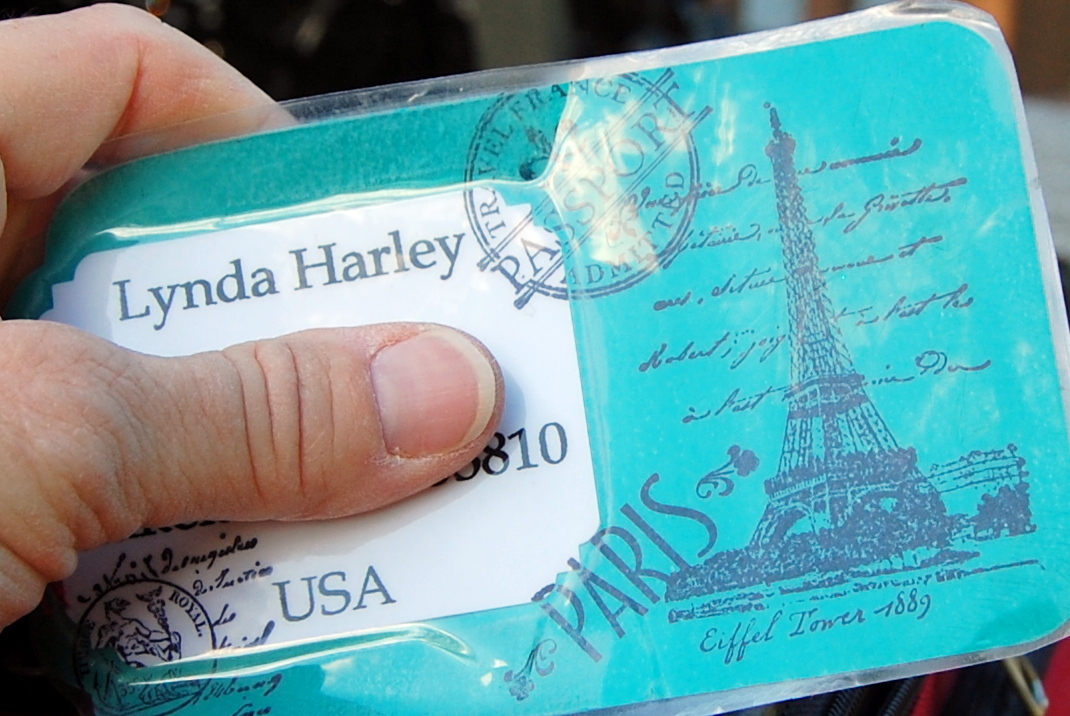
This is one side, the other side has all the names and address on them. I chose ribbon that matched the paper. Make some long so you have enough length to tie onto the suitcase and knot several times.


TIE TO YOUR LUGGAGE>>>>several knots actually.......


They look great on the red suitcase eh?


Photo below is a tag made two years ago that survived two trips to Paris, a trip to the Bahamas and Alaska!


These have made great gifts for bridesmaids, friends and family. Last year we made them for the end of the year party and place a tag with just the name on a dollar plastic sand bucket and filled it with goodies. You can even make them, and have the folks write on them with a sharpie after they are laminated........
If you have questions, please feel free to leave me a comment and your email address.

Happy Crafting......Happy Summer! ~Lynda

Linking up with parties below:


TidyMom


By Stephanie Lynn
PJH Designs